How to add a watermark or logo to an Ant Media Server live stream
·A watermark is a simple way to identify the owner or source of a live video. It can keep a brand visible when a stream is embedded elsewhere, provide attribution when clips are shared, and discourage basic forms of unauthorized reuse.
In this post we’ll walk through the options for watermarking live video with Ant Media Server, and then go hands-on with the Stamp plugin to burn a logo directly into a live broadcast using nothing more than a REST API call.
Server and client side watermarks
Before reaching for a plugin, it’s worth understanding the two fundamentally different ways a watermark can end up on a viewer’s screen.
A player-side watermark is drawn in the browser or app on top of the video element, after the stream has already left the server. It costs nothing in server processing, and you can even show a different overlay per viewer. The catch is that it’s cosmetic: anyone with access to the underlying stream URL can play it in a different player and the watermark simply won’t be there.
A server-side watermark, by contrast, is composited into the video frames themselves before they’re re-encoded. Once it’s baked in, it shows up in every compatible player and in any redistributed copy of the stream, which is exactly what you want for branding or anti-piracy purposes. The trade-off is that the server now has to decode, modify, and re-encode every frame, which adds processing overhead. For larger deployments — multiple concurrent streams or several renditions per stream — Ant Media Server recommends running on GPU-enabled hardware to absorb that extra cost.
Stamp capabilities
Stamp for Ant Media Server implements
the server-side approach. It’s a commercial plugin that lets you decorate a
live stream with image, text, ticker, clock, and even full HTML overlays,
all driven through a REST API. Because control happens over HTTP, you can
add or remove overlays with curl, a Postman collection, or straight from
your own application — nothing about it is tied to a specific broadcast
tool. Version 2.0.0 and later also support rendering complete web pages as
overlays, which opens the door to using cloud overlay providers such as
Singular.live or Overlays.uno directly on top of an Ant Media Server
stream.
Requirements
Before installing Stamp, make sure you have the following in place:
- A working Ant Media Server installation
- The Stamp plugin JAR and a valid license — without a license the plugin still runs, just in a time-limited trial mode
- An application configured on the server, such as the default
LiveApp - Adaptive Streaming enabled with at least one rendition
- A live source: OBS, vMix, FFmpeg, or anything else that can push RTMP/SRT/WebRTC into Ant Media Server
- The watermark asset itself, as a PNG, JPEG, or animated GIF
If your logo needs to sit cleanly over the video with a transparent background, a transparent PNG is the format to reach for — it avoids the white or black box you’d get from a JPEG.
Installation
The full installation procedure is documented on the Stamp installation page, but the short version looks like this:
-
Download
ams-stamp-x.y.z.jarand place it in the Ant Media Server plugins directory:cd /usr/local/antmedia/plugins sudo wget https://streamtoolbox.com/download/ams-stamp-2.3.0.jar -
If you have a license file, copy it into Ant Media Server’s
confdirectory. Without one, Stamp logs a message on startup and runs in time-limited trial mode instead of refusing to start. -
Restart the service so the plugin is picked up:
sudo systemctl restart antmedia.service -
Check the Ant Media Server log for a Stamp startup entry for your application to confirm the plugin loaded correctly.
By default, Stamp starts with a calibration grid overlaid on every stream. It’s genuinely useful the first time around: the grid confirms that frames are actually being processed by the plugin, and the coordinate labels make it easy to work out where to place your first overlay.
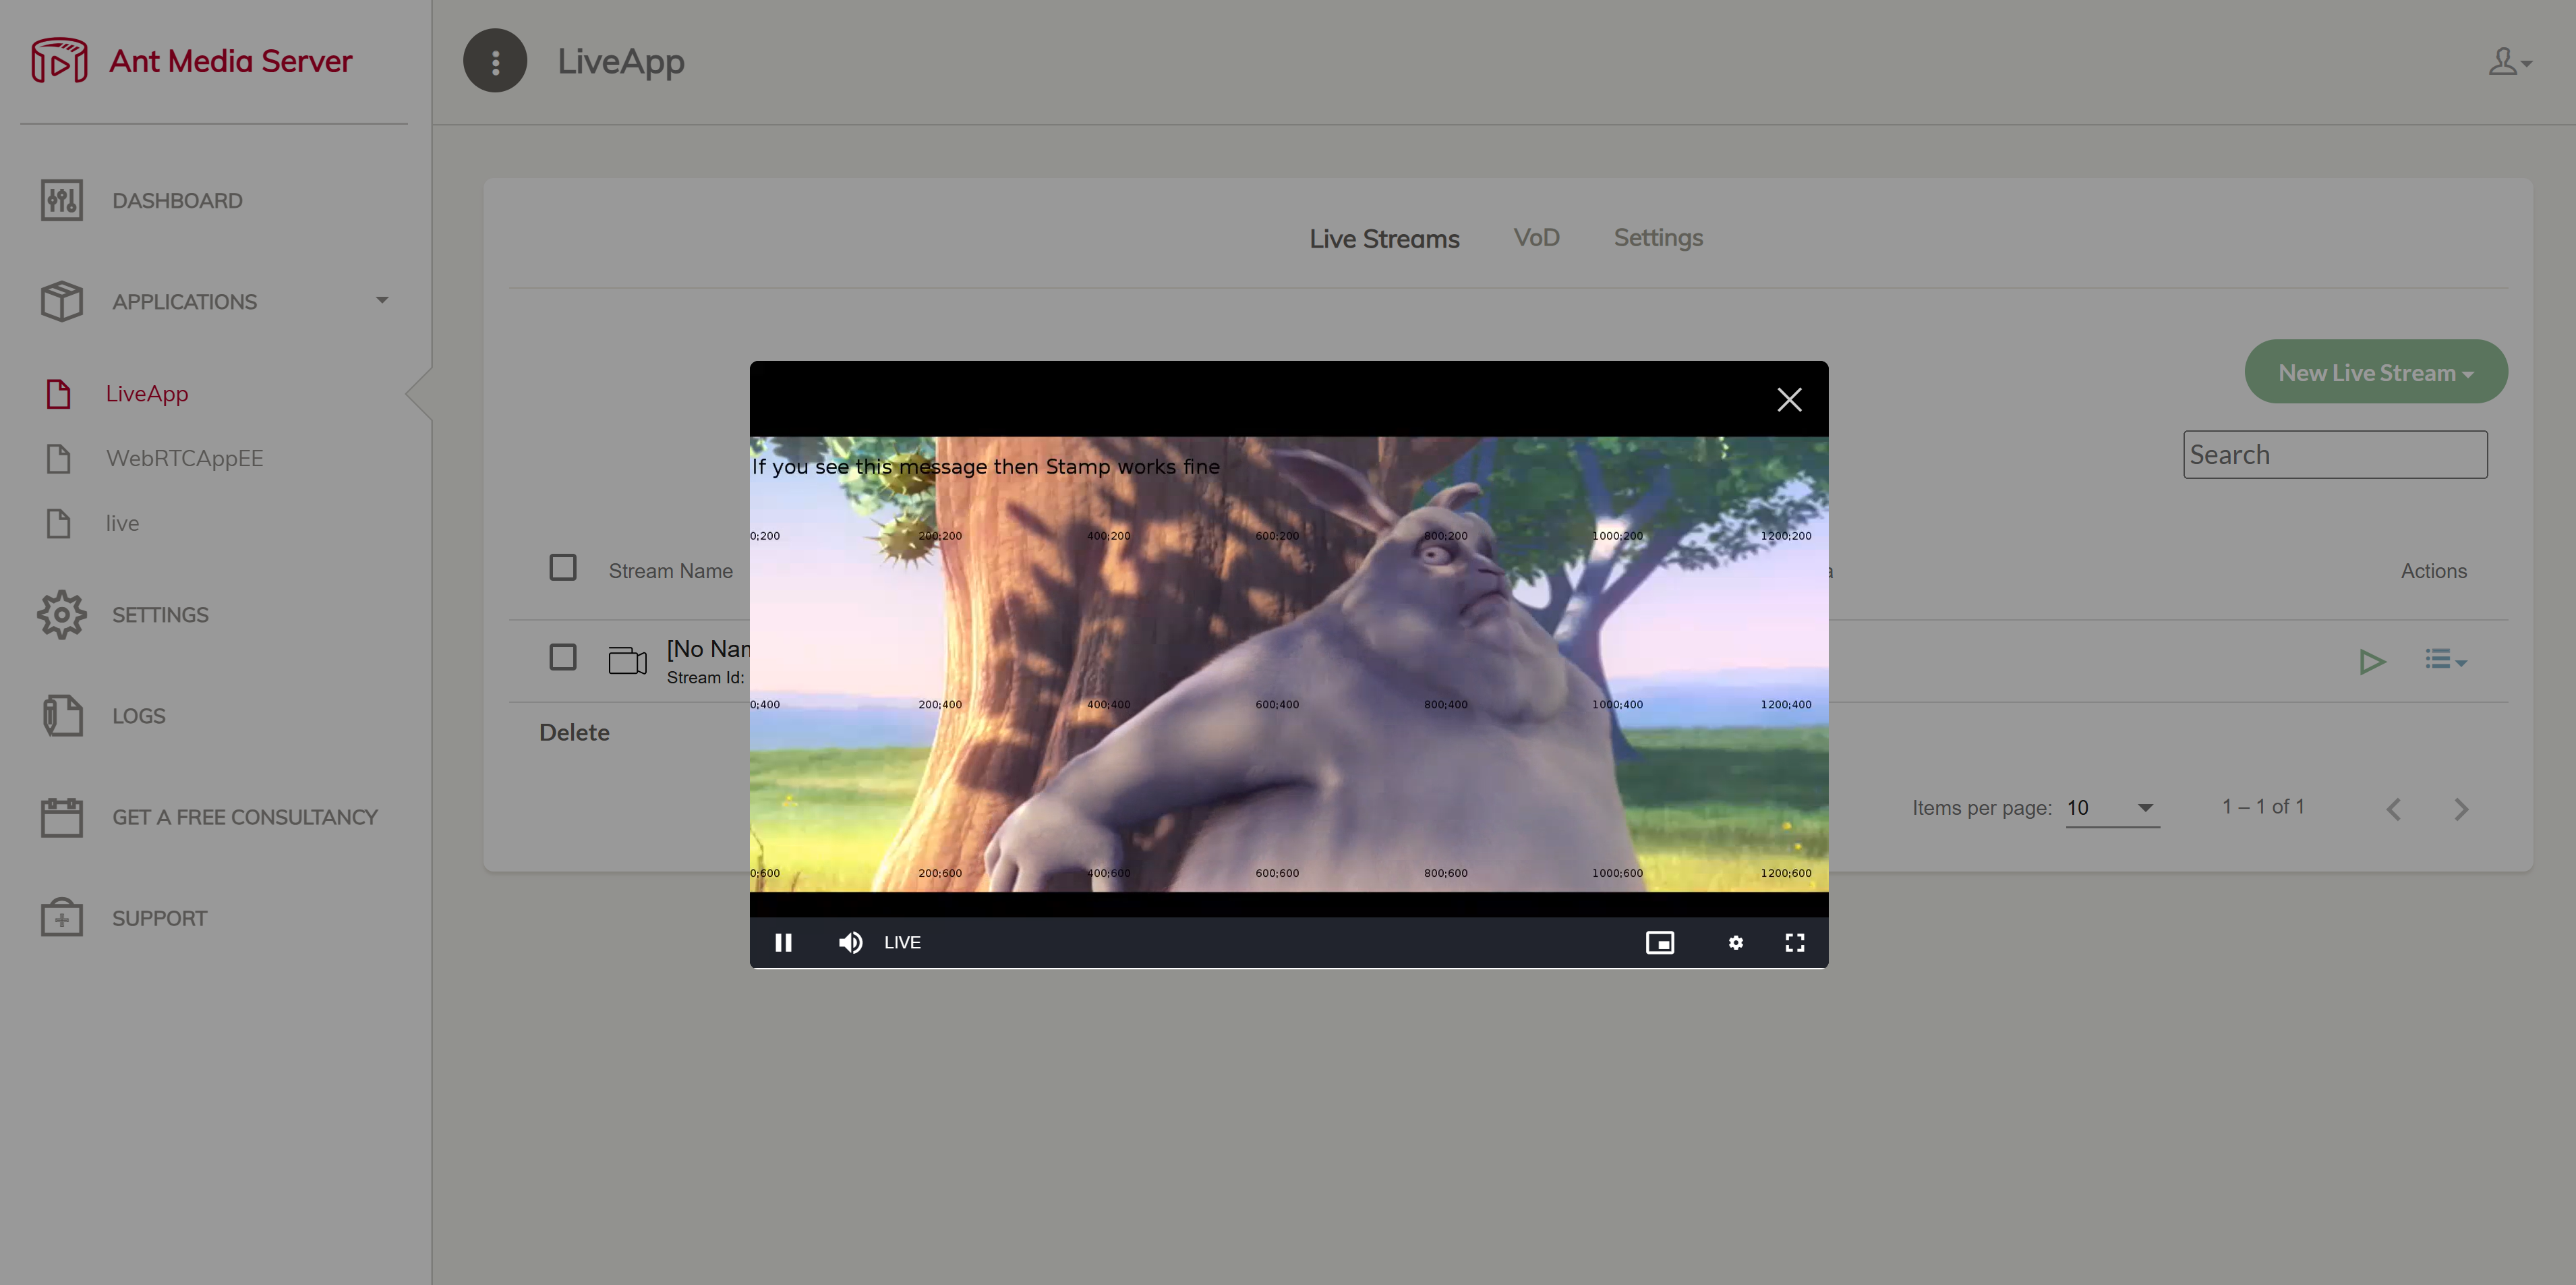
Once you’ve got your bearings, turn the grid off by adding the following
line to /usr/local/antmedia/conf/stamp.conf:
stamp.calibrate.grid=false
Any change to stamp.conf requires another restart of Ant Media Server to
take effect.
Stream preparation
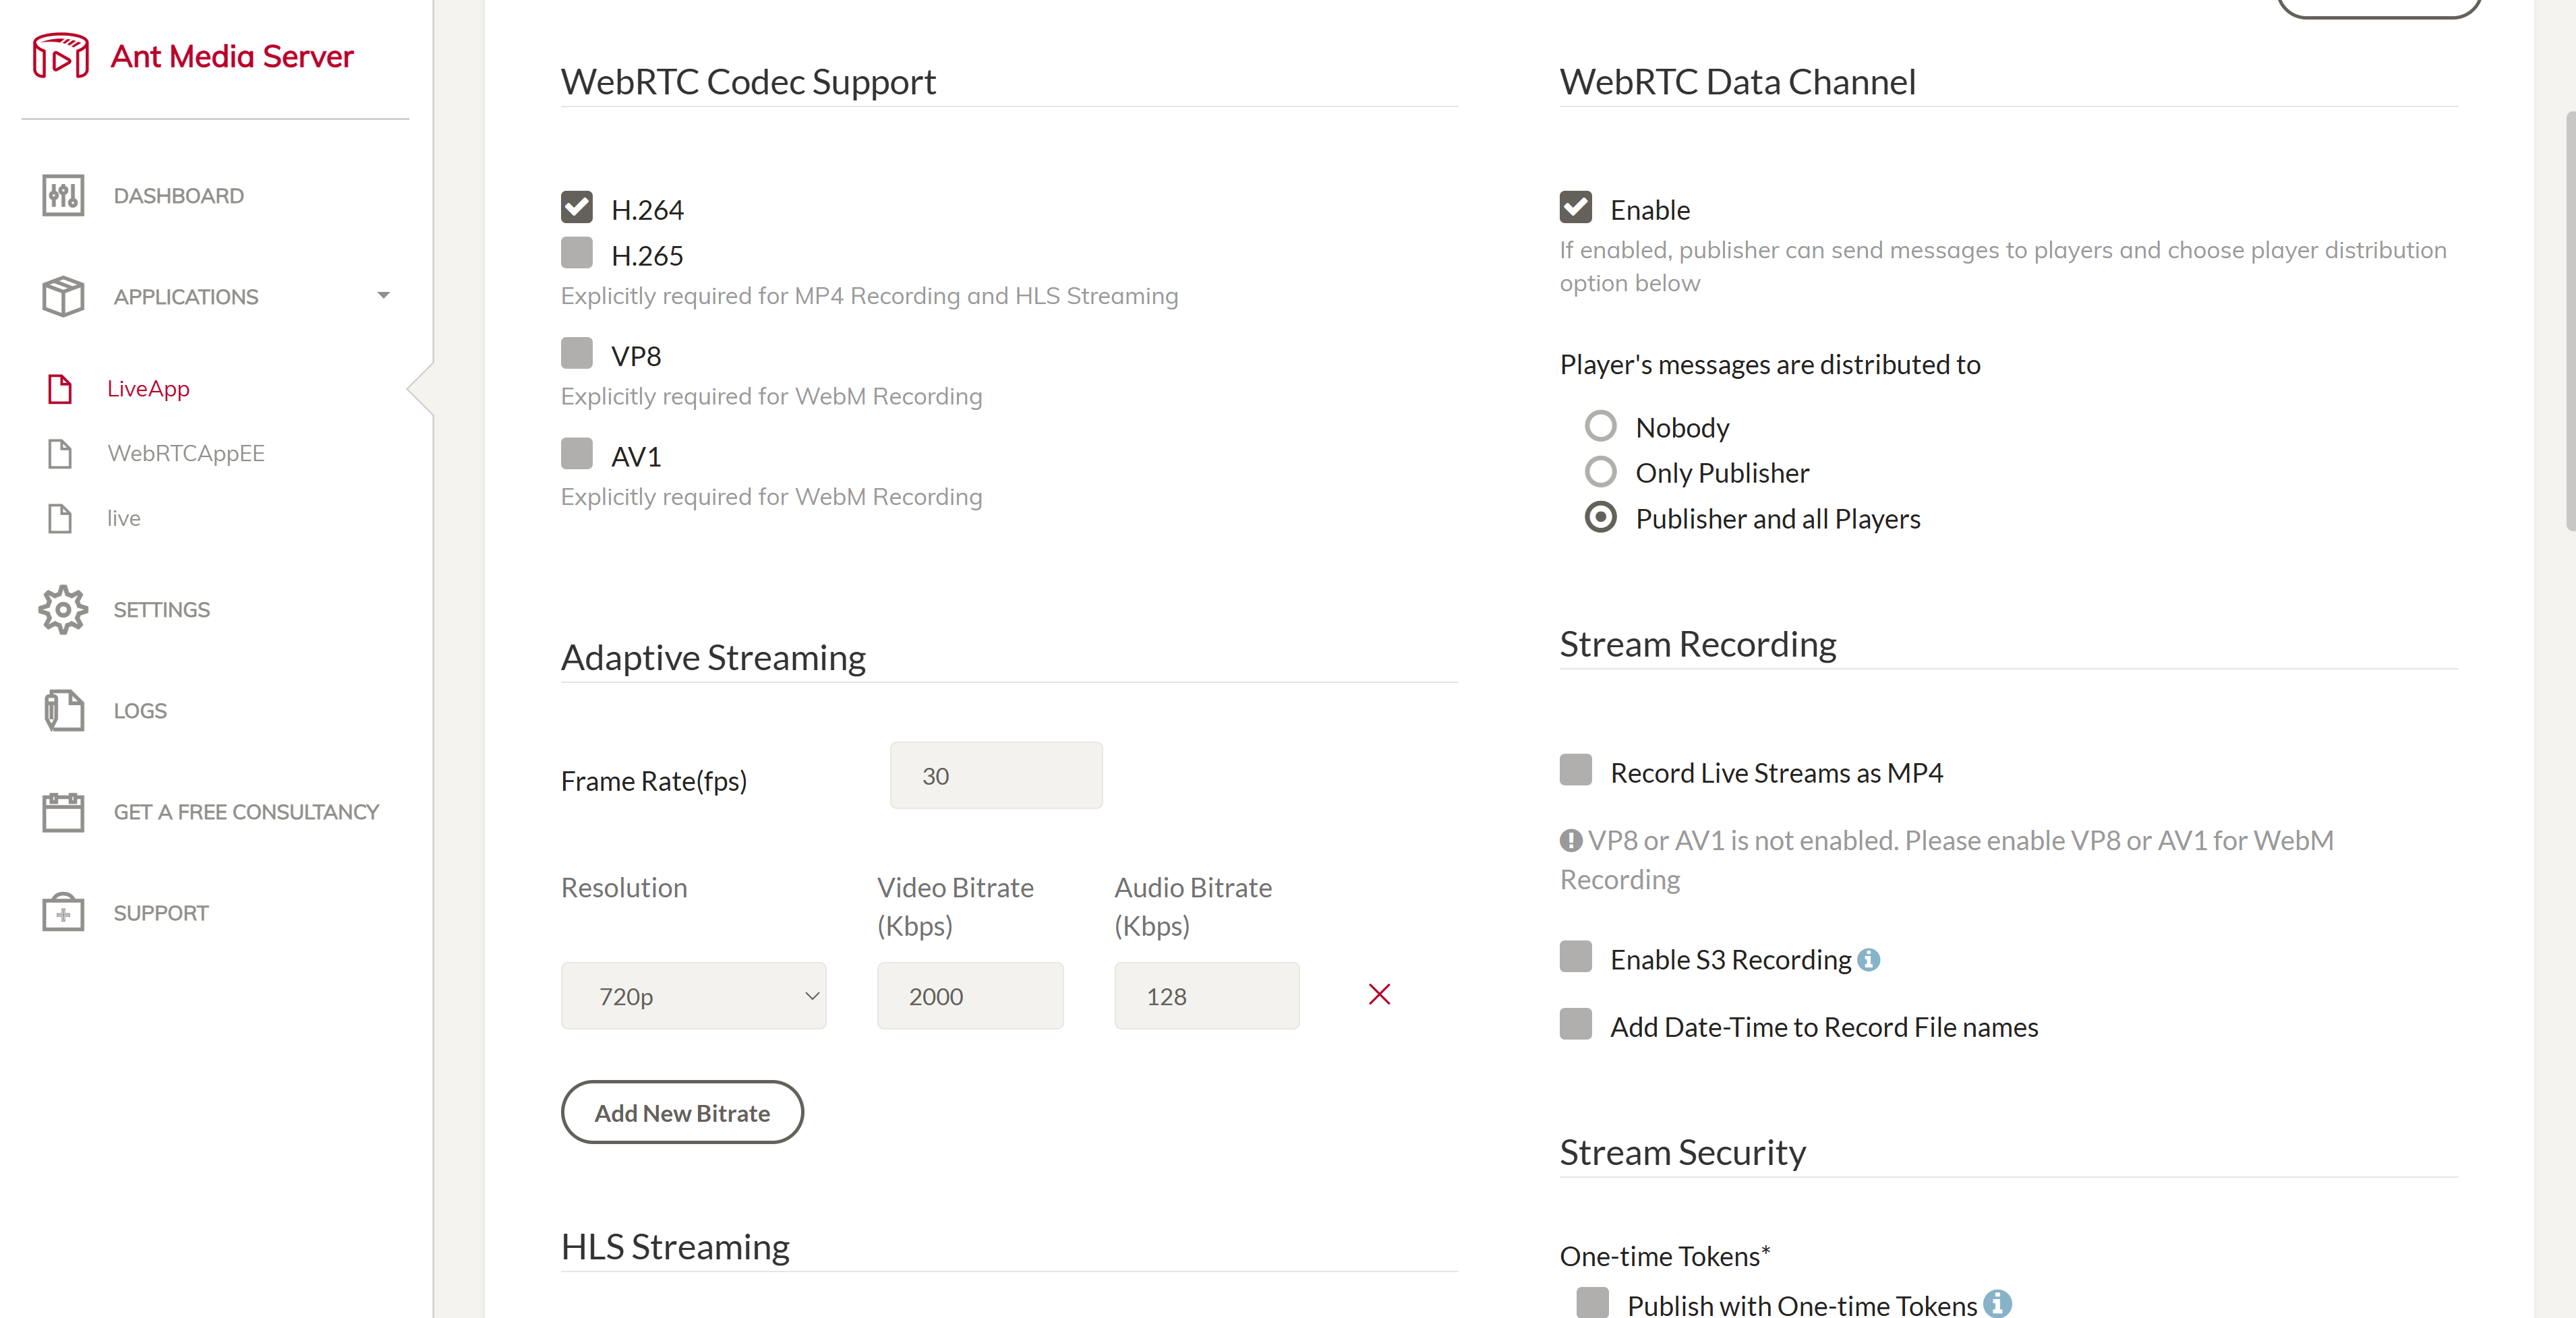
With the plugin installed, switch over to the Ant Media Server management panel to prepare the application that will receive your stream. Open the application’s settings, enable Adaptive Streaming, and configure at least one rendition — Stamp needs a transcoded rendition to draw on, and adaptive streaming is what makes that available. Pick a resolution and bitrate that match your source and your audience, and keep an eye on system load and any frame-processing warnings in the log, especially if you’re running several streams through the same server. For heavier workloads, Ant Media Server’s GPU guidance is worth following so the transcoding and overlay work don’t become a bottleneck.
Stream publication
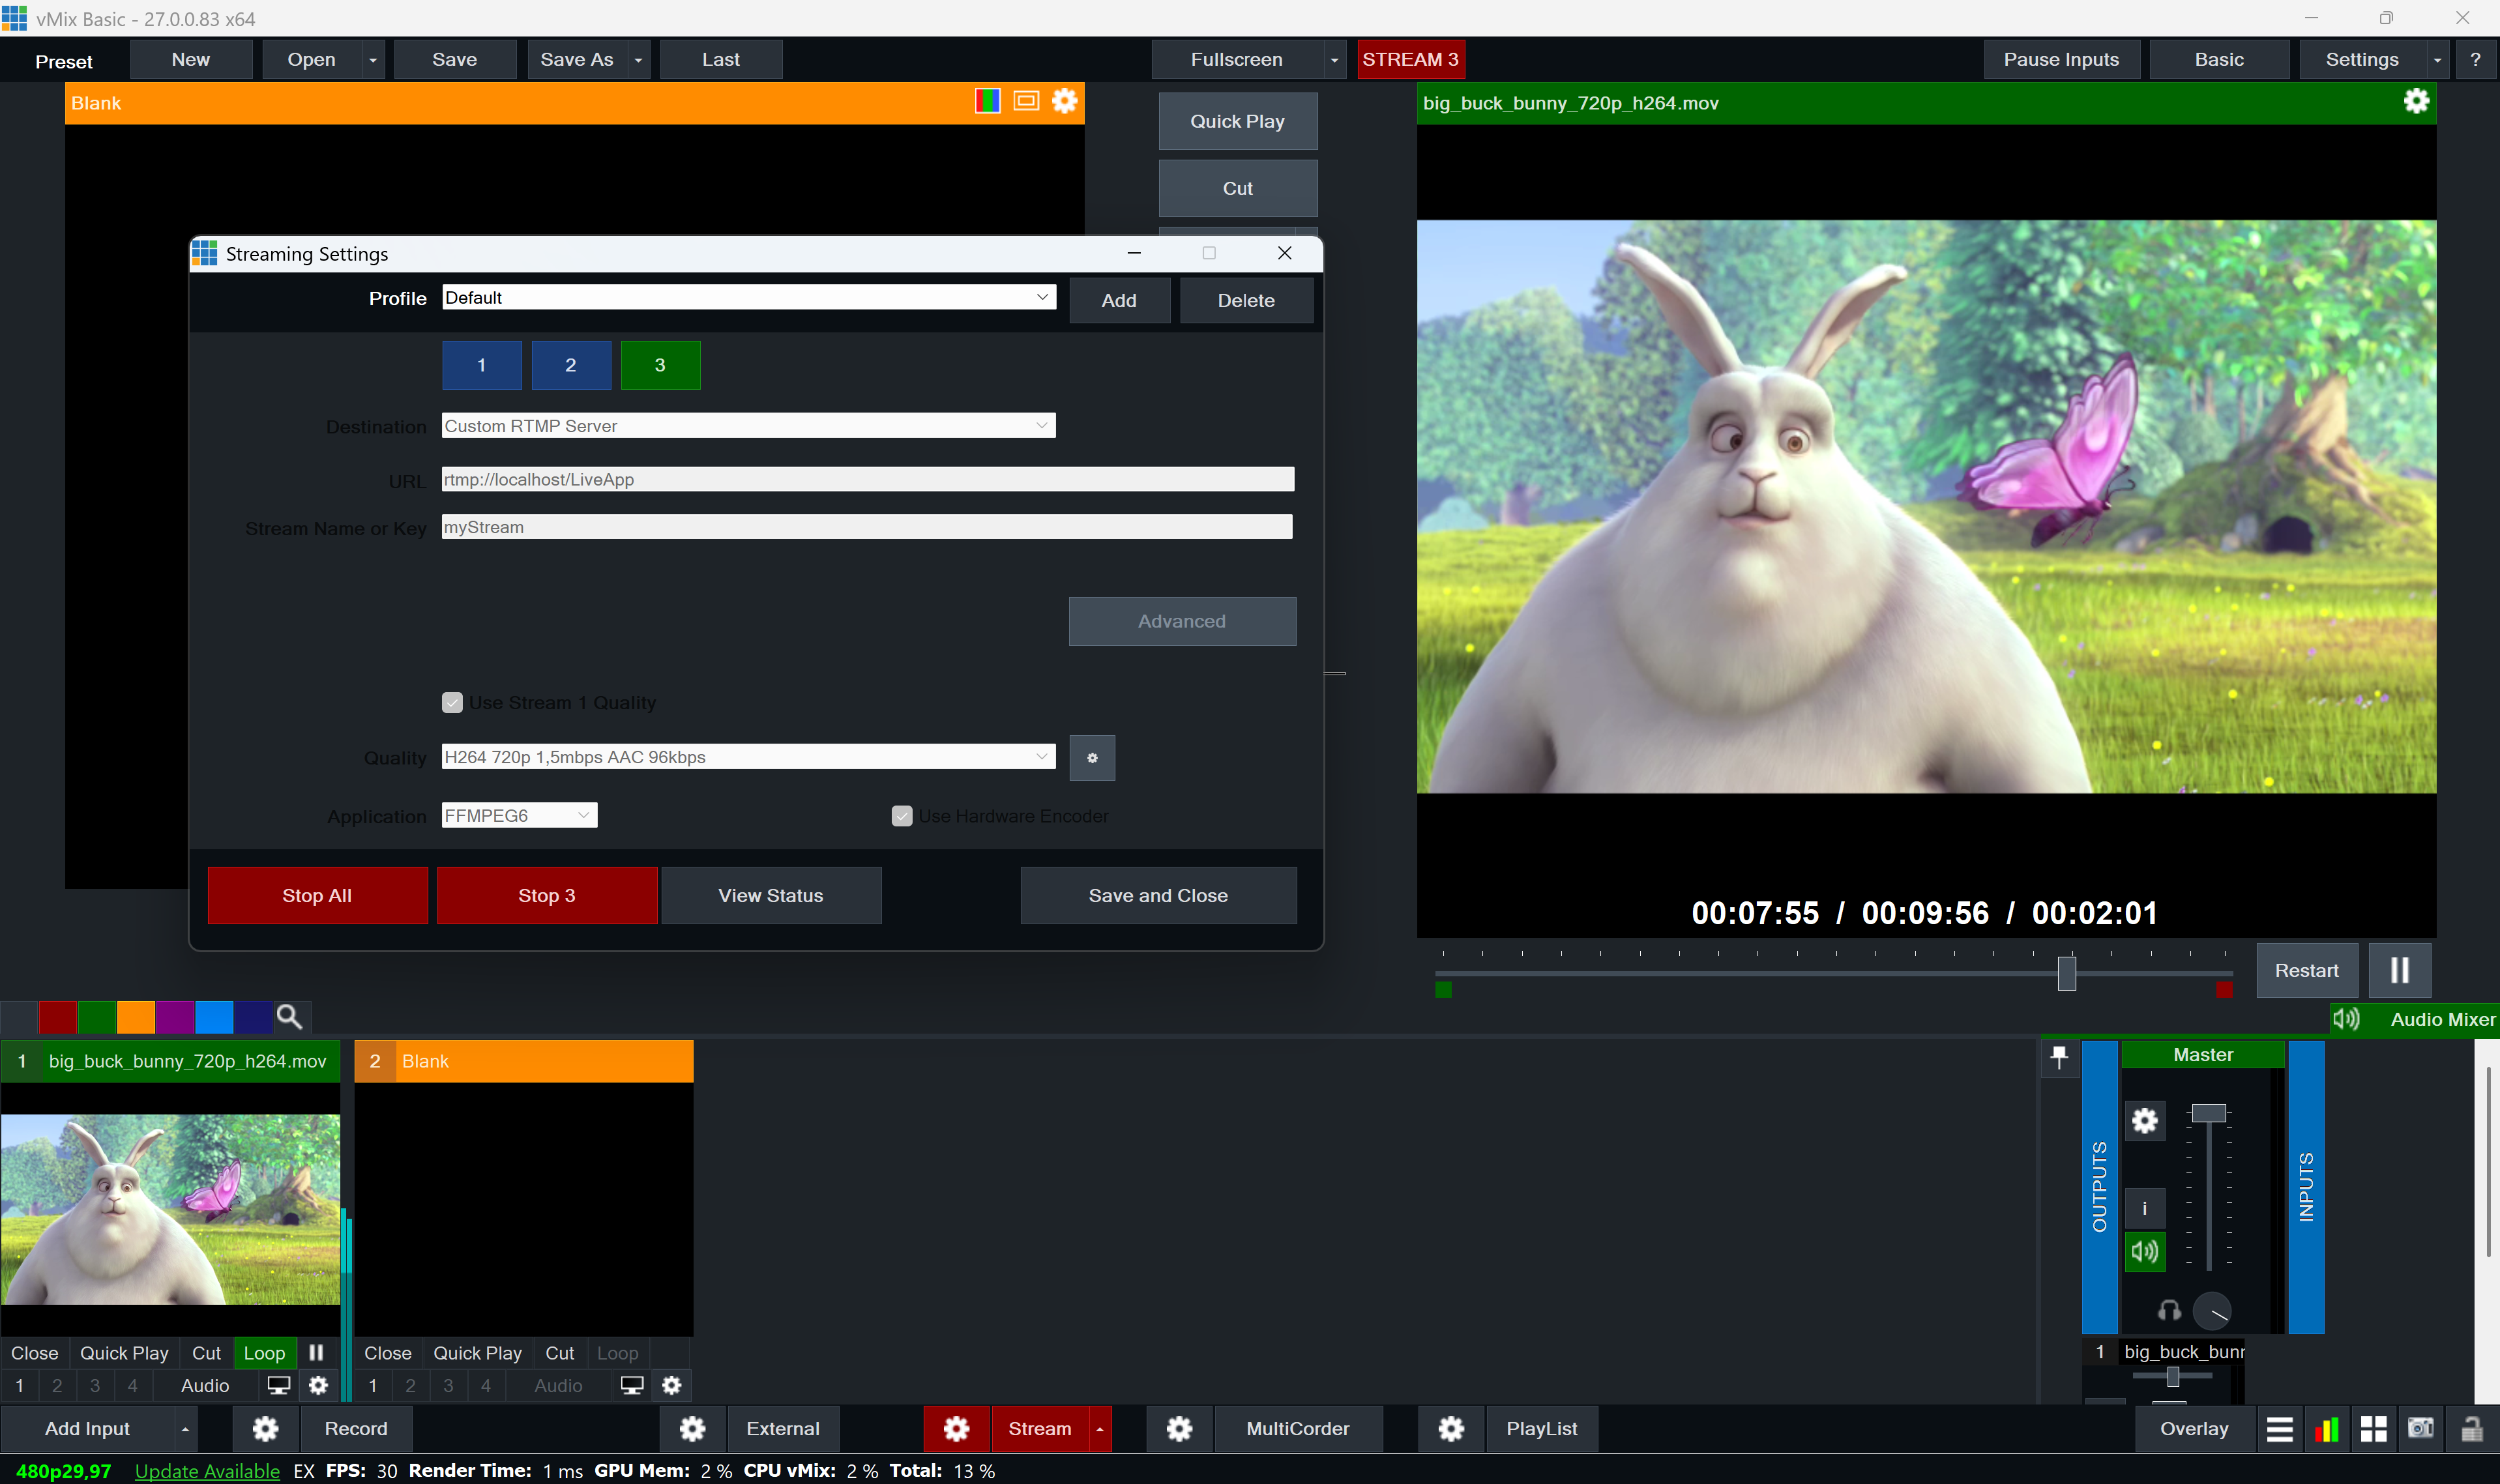
Next, point your encoder - OBS, vMix, FFmpeg, or whatever you’re already using - at the application you just configured:
Server: rtmp://your-server.example:1935/LiveApp
Stream key: myStream
Before moving on to watermarking, confirm you can actually play back the transcoded stream.
Watermark instruction
With a live, transcoded stream running, adding a watermark is a single
POST request to Stamp’s instructions endpoint:
curl --request POST \
  'http://localhost:5080/LiveApp/rest/stamp/instructions' \
  --header 'Content-Type: application/json' \
  --data-raw '
{
  "id": "watermark-1",
  "start": "now",
  "end": "2100.01.01 00:00:00.000",
  "image": "/tmp/live-logo.png",
  "position": {
    "x": 10,
    "y": 10,
    "anchor": "top-left"
  }
}'
Replace localhost with your Ant Media Server’s hostname when calling this
from outside the server itself. A few fields are worth calling out:
id— a unique identifier you choose, used later to update or delete this instructionstart— when the overlay becomes active;nowactivates it immediatelyend— when the overlay expiresimage— the image source (more on the supported formats below)position— placement coordinates and anchor point
In this example, /tmp/live-logo.png needs to exist on the Ant Media
Server host itself and be readable by the process running the server. The
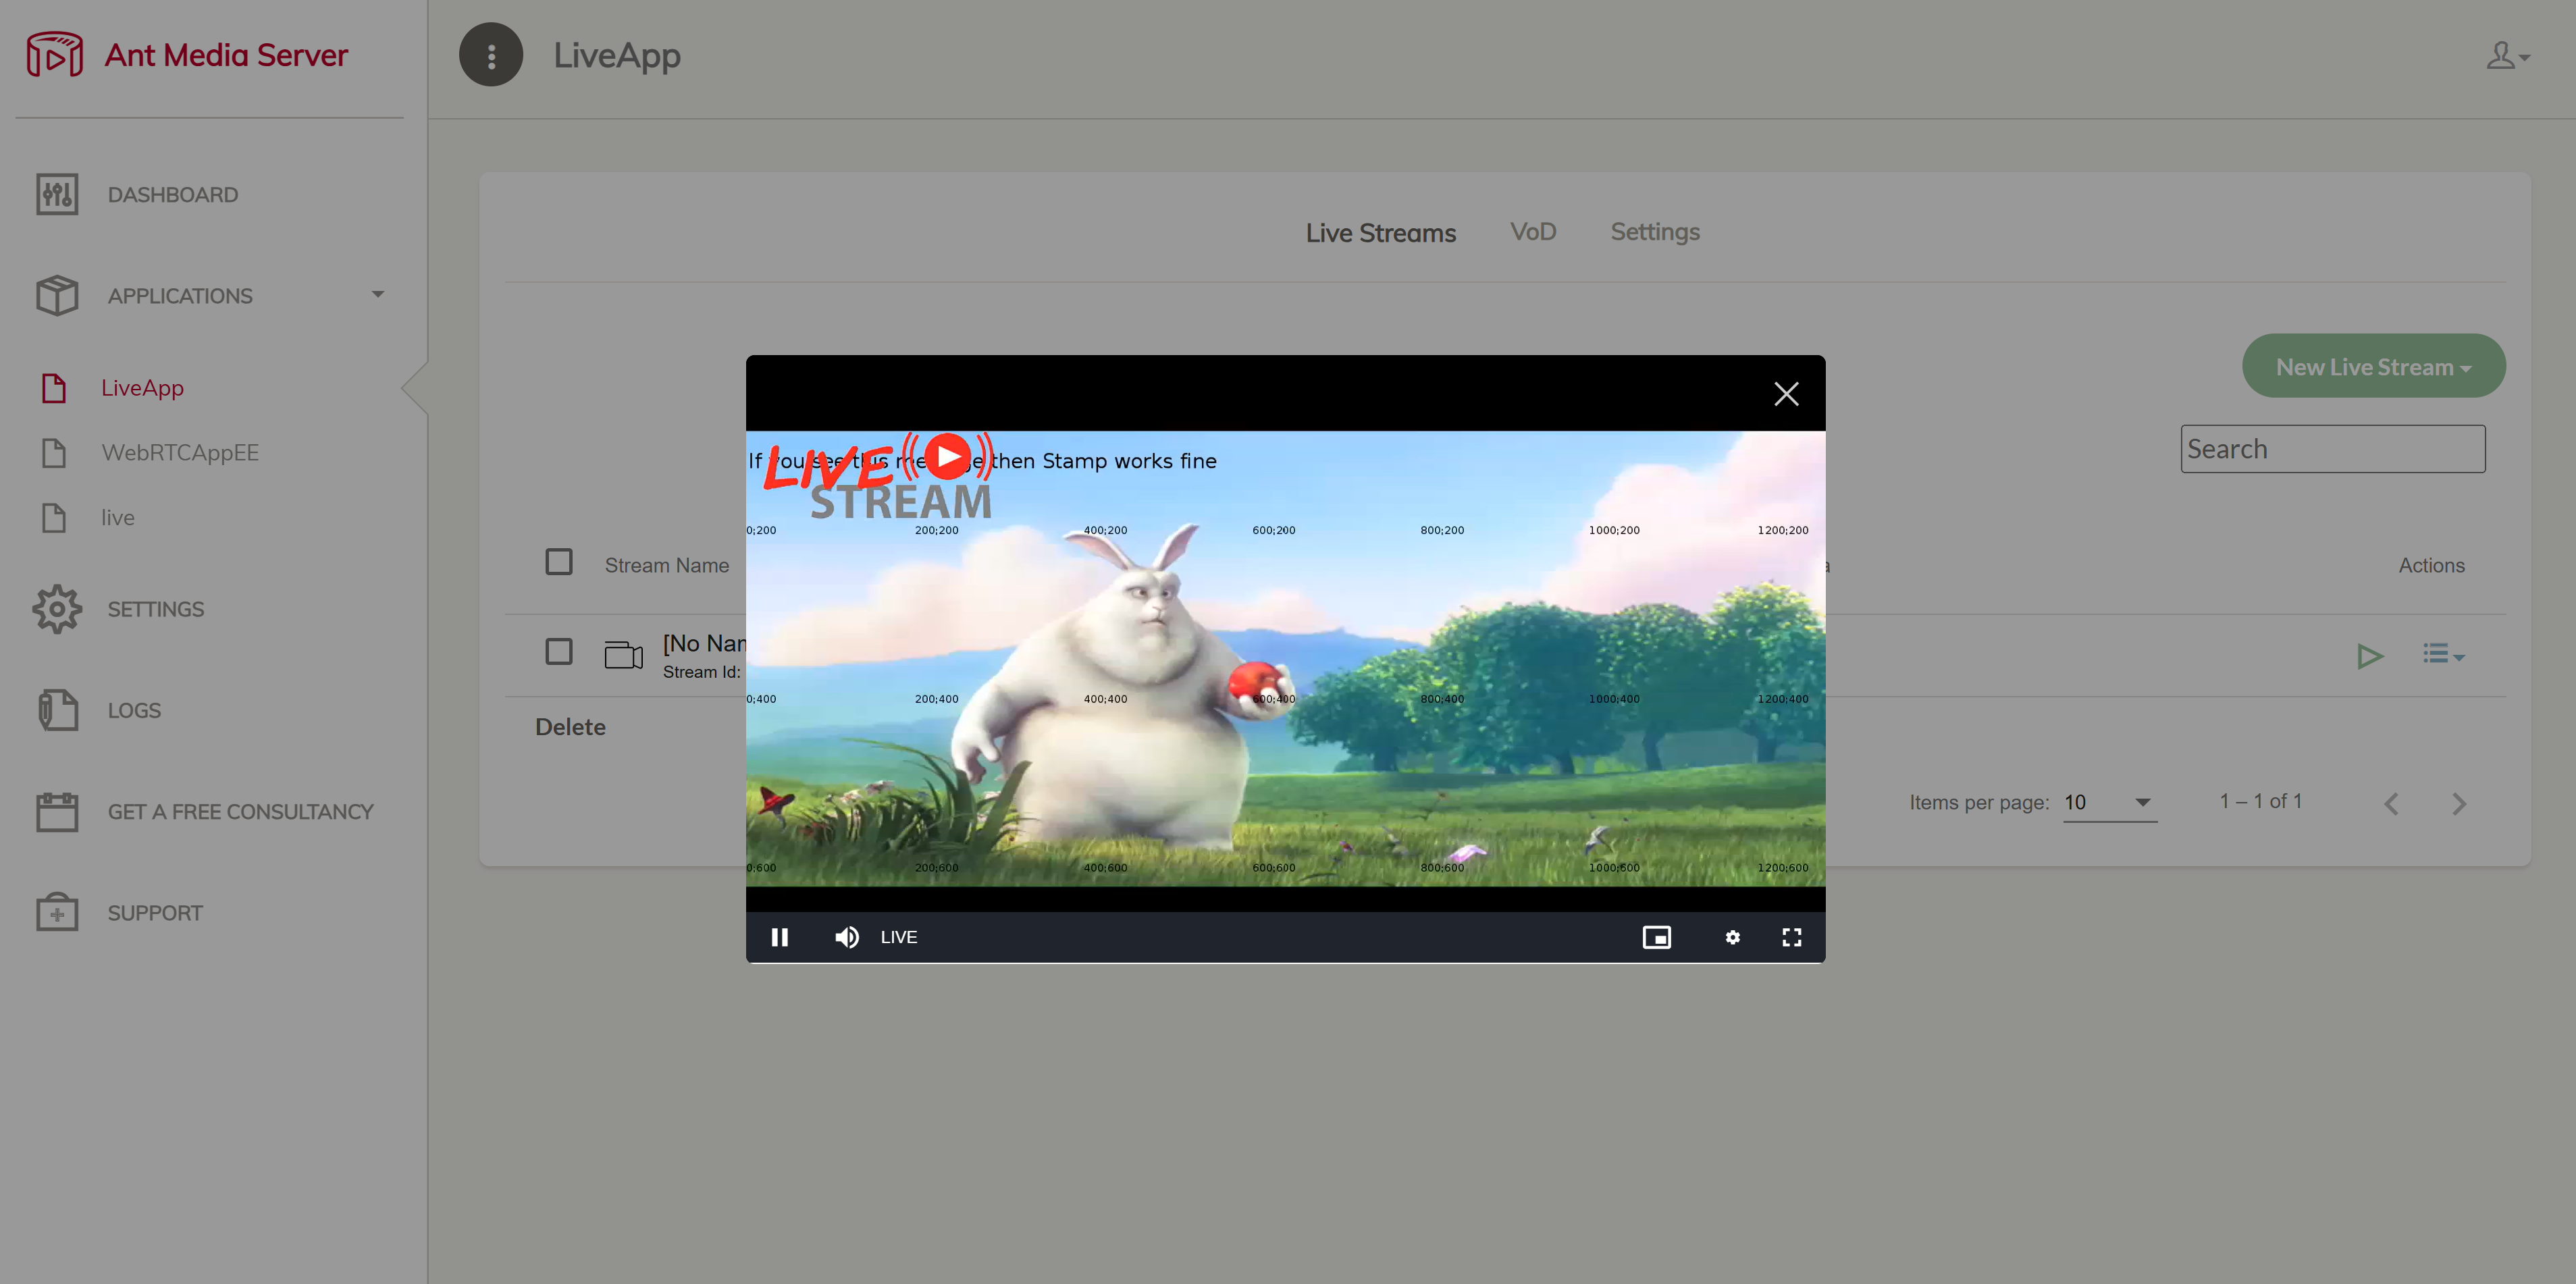
position block places it 10 pixels in from the top-left corner. The
result is a logo composited directly into the video frames:
Supported image sources
Stamp doesn’t require the image to already live on the server — the
image field accepts three different kinds of sources, and which one you
pick depends mostly on where your logo is coming from.
Server file
The simplest option: point image at a path that’s readable by the Ant
Media Server process, for example /tmp/live-logo.png. This is the
approach used above.
Base64 data URL
If the caller doesn’t have access to the server’s filesystem and the image is small, you can embed it directly in the request as a base64 data URL. Generate the unwrapped base64 payload with:
base64 -w 0 live-logo.png
and pass it as the image value:
"image": "data:image/png;base64,PASTE_BASE64_DATA_HERE"
This is convenient for automation that has no server access at all, but it does inflate the size of every request. For anything beyond a small icon, prefer a server file or an external URL instead.
External URL
You can also point image straight at a direct, unauthenticated HTTP or
HTTPS URL:
"image": "https://example.com/assets/live-logo.png"
Stamp downloads and caches the image server-side, so the directory it
writes to — /var/tmp by default — needs to be writable by the Ant Media
Server process. That location can be changed with the
stamp.image.cache
setting if /var/tmp isn’t suitable in your environment. For production
use, favor a stable URL for the asset; if the underlying image changes
frequently, either version the URL or update the instruction with a fresh
one rather than relying on cache invalidation.
Animated GIF
All three source types — local path, data URL, or external URL — also
work with animated GIFs. Combined with the duration field, this is a
handy way to run a time-boxed animated bumper:
{
  "id": "animated-watermark",
  "start": "now",
  "duration": 30,
  "image": "https://example.com/assets/animated-logo.gif",
  "position": {
    "x": 10,
    "y": 10,
    "anchor": "top-left"
  }
}
Watermark removal and replacement
An active or scheduled instruction can be removed at any time by its ID:
curl --request DELETE \
  'http://localhost:5080/LiveApp/rest/stamp/instructions/watermark-1'
To replace a watermark, either delete the old instruction and submit a new one, or update the existing instruction directly through the Stamp API. Either way, giving your instructions stable, descriptive IDs up front pays off later — it makes automating watermark changes much simpler than having to look up generated IDs first.
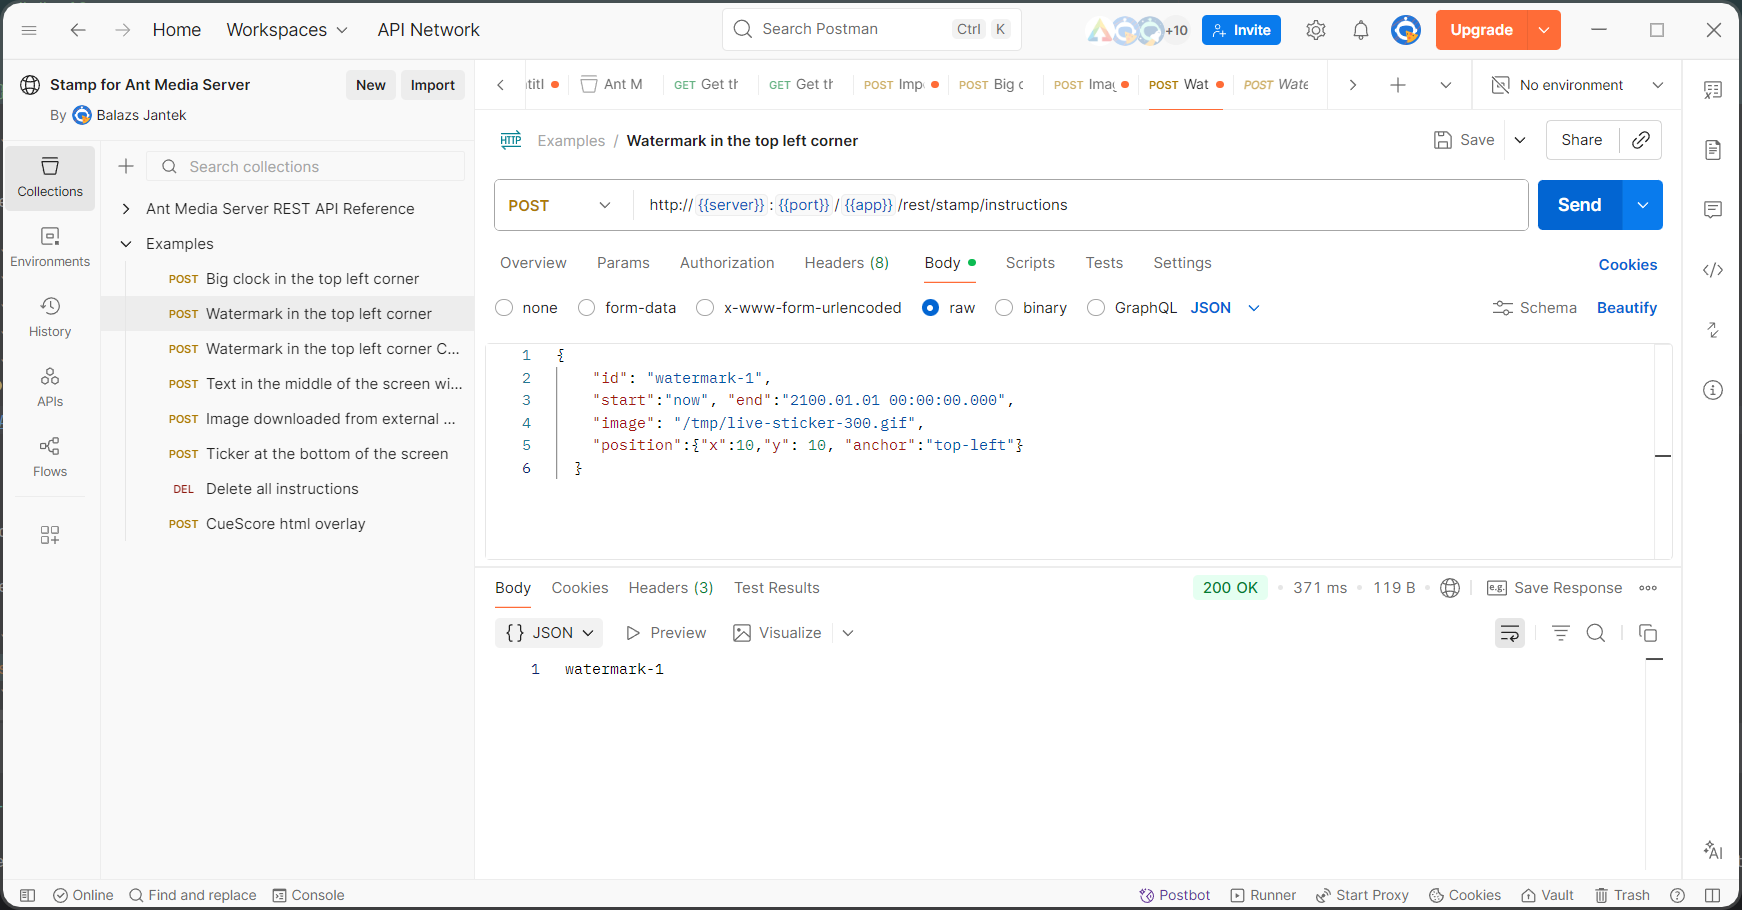
Postman operation
If you’d rather not hand-craft curl commands, Stamp ships a
Postman collection
with ready-made requests for adding and removing watermarks. Import it,
fill in your environment-specific values — server address, application
name, stream name, and the asset path or URL — and you have a repeatable
way to test overlay changes without writing any code.
API security
Because the Stamp API can modify a live output in real time, it’s worth treating it with the same care as any other administrative endpoint on your server. Restrict access using Ant Media Server’s REST API IP filter or JWT authentication, serve the API over HTTPS rather than plain HTTP, and keep any administrative token out of client-side or end-user-facing scripts.